Want to maximise the longevity of your home without spending a huge amount of money? Be it trying to achieve flawless walls or repairing the plastering boards, GIB stopping helps with achieving superior finishing of the ceilings and plasterboard walls. With expert craftsmanship, it helps with seamless uniformity.
However, for intricate detailing and excellent finishing, professional expertise is a must. For home improvement and renovation, connecting with skilled Auckland GIB-stopping professionals provides smooth finishing.
GIB stopping – What does it help to achieve?
Before delving into its benefits, it is necessary to know more about what exactly it is. It is accompanied by the plasterboard installation process that includes fixing the interiors of the GIB boards. It helps in creating a smooth and uniform wall and ceiling surface by filling the joints or gaps between the GIB boards.
Here are some of the benefits of GIB stopping
Impeccable, flawless finishing
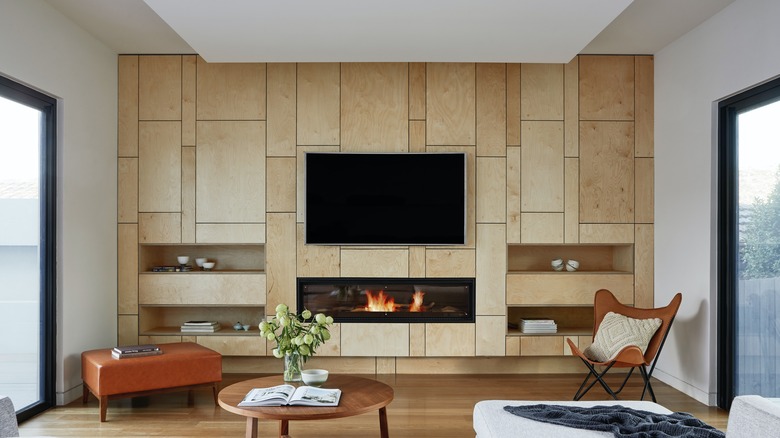
One of the best ways to create a seamless finish on the plaster walls is through GIB stopping. It helps in covering all the seams and joints, making it unnoticeable. As a result, it creates a fine surface that is ready for painting while eliminating uneven surfaces. This is a great and affordable way to enhance the aesthetic appeal.
Increases the longevity
As it seals all the gaps and adds a protective layer to prevent dents and cracks, it helps in improving the longevity of the structure. The GIB stoppers are foam strips that are self-adhesive in nature and hence help with sealing the gaps on the walls. This helps with compressing the gaps or cracks, reducing moisture absorption. Hence, with its ability to enhance durability, it increases the overall life span of the plasterboard walls or ceilings.
Improves energy efficiency
GIB plasterboards are sustainable options as they are recyclable and eco-friendly. As the GIB stopping process seals all the gaps or cracks, it prevents air leaks and hence enhances indoor insulation. It is excellent for homes in colder places as it traps heat and reduces the overall reliance on a heating system. This makes the entire process easy and energy efficient.
Easy maintenance
With higher longevity, the expenses coming from its maintenance are also reduced. As the plasterboards are easy to repair and install, once the GIB stopping process is complete, it helps in keeping the maintenance at bay. As the surfaces are smooth and the walls or ceilings are uneven, one has to worry less about constant renovation.
Tips to hire the right professional for the job
Before going forward, it is crucial to consider a few aspects of hiring skilled and experienced professionals.
- Choosing highly skilled professionals well-versed with the techniques is crucial. The expertise in the process eliminates room for error.
- As it is a time-consuming process, precision is another thing to consider. Always check for reviews and references before hiring a company.
- Take into cognizance the tools and equipment used by the GIB-stopping technicians. The right tools streamline the process.
Here are the steps involved in employing the GIB-stopping process:
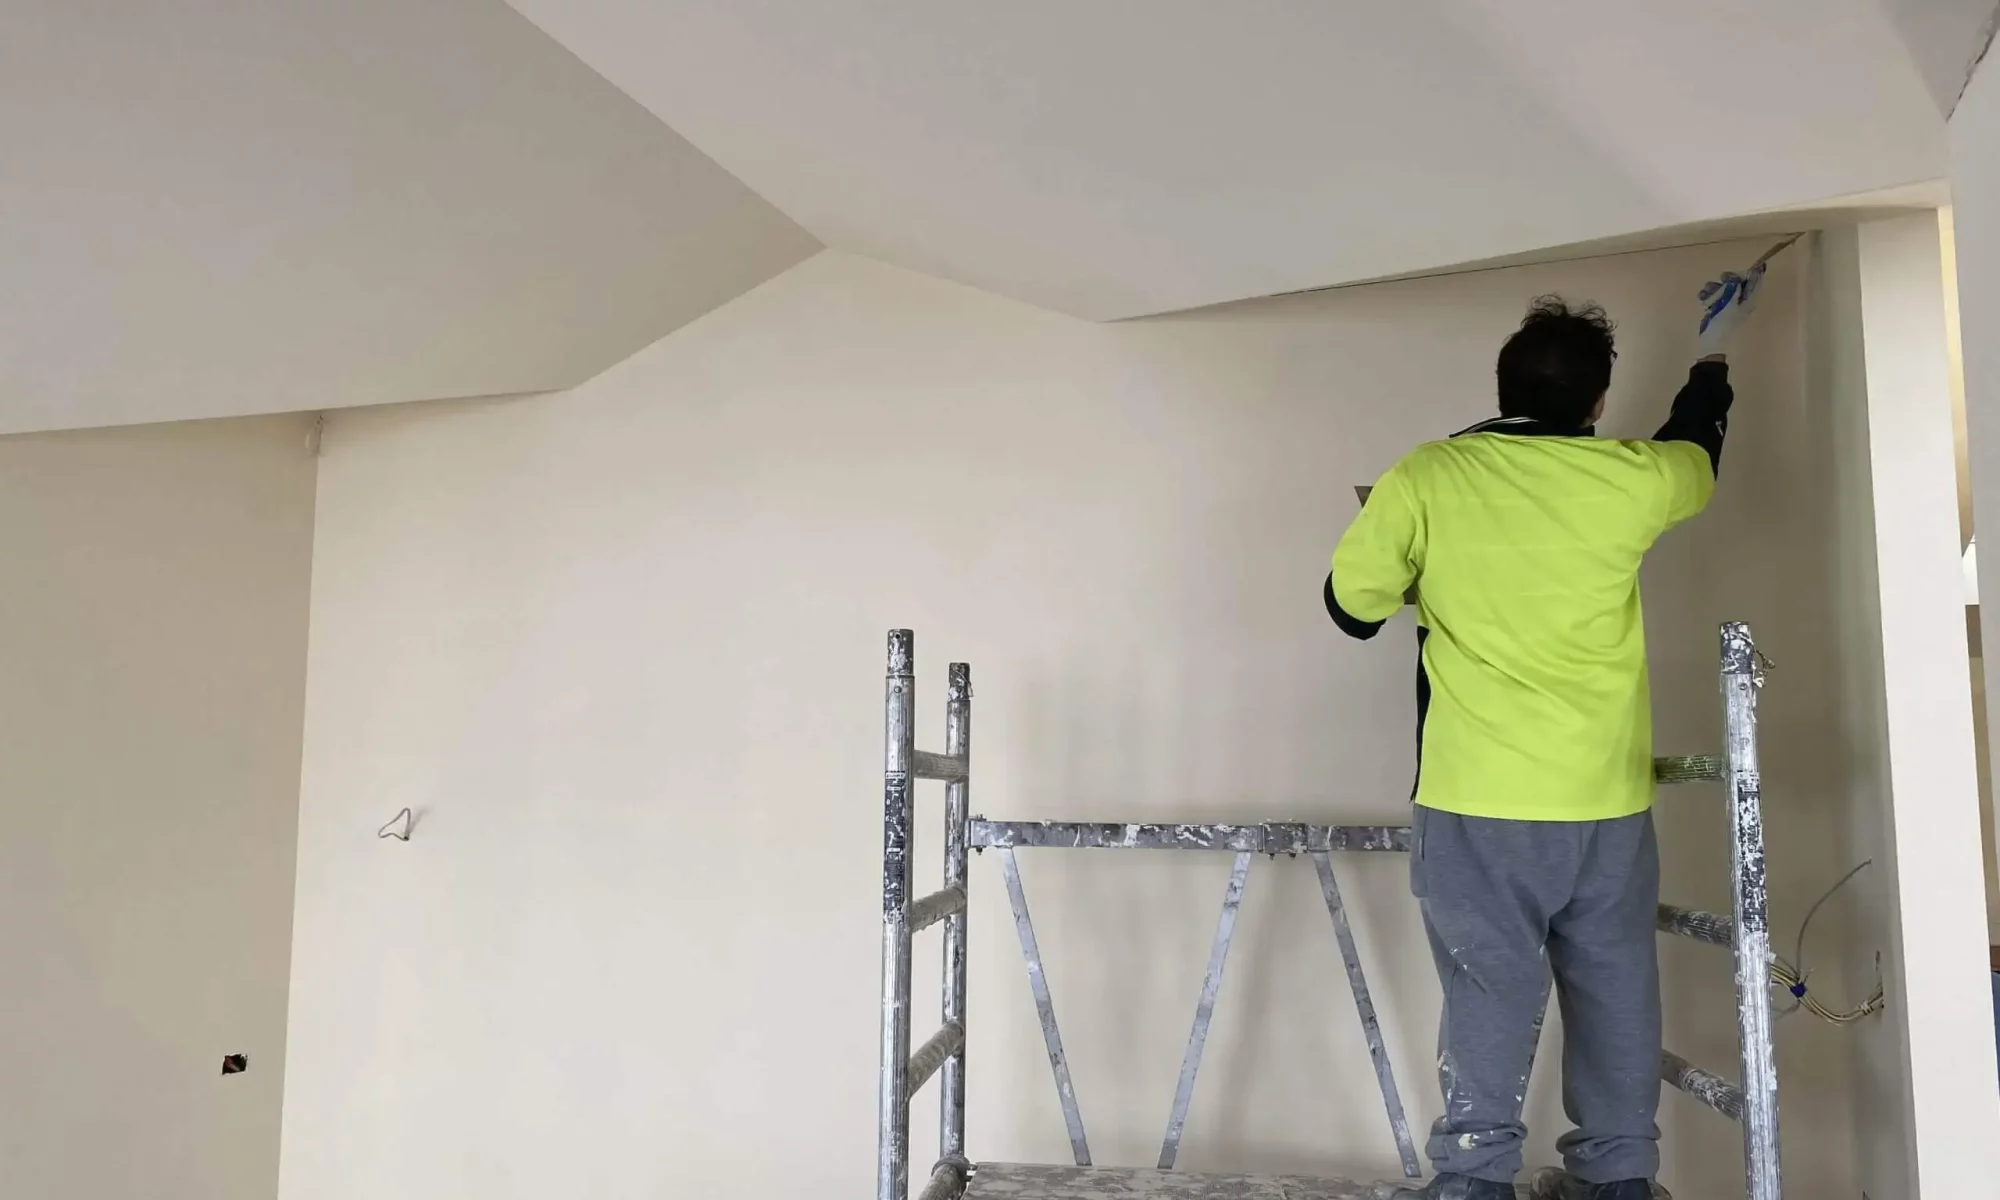
The professionals take care of every nitty-gritty detail while installing the GIB stopping boards. The work goes beyond just simply preparing and finishing plasterboard but extends beyond that. The following steps go into the process:
Preparation of the surface
The first step before starting the project is preparing the surface. Unless the surface is even or well-prepared, it might not fix the plasterboards easily. Hence, the surface is evened out and eliminated for dents, holes, or uneven surfaces. Also, the professionals check for any sort of imperfections before installation of the plasterboards.
Joining the plasterboard sheets
Once the plasterboard sheets are installed, it is crucial to join the gaps with the help of paper tape. The application of paper tape to the plasterboard sheet joint prevents development of the cracks in the boards over time. This is where the GIB-stopping expert professionals take extra care in connecting the boards by embedding and connecting them with the tape.
Use of the right tools
The professionals execute the GIB-stopping process with the use of the right tools. The experts have all the right tools handy which helps in following the process of installation with precision. Experts use a range of tools like taping knife which helps in embedding tap between the boards and enhance the bond. Also, sanding tools help with achieving a smooth finish, hawk, and trowel are indispensable tools that ensure providing smooth finish.
Coating application
Once the taping and jointing are completed for the boards, it is followed by the application of the first coat of plaster, also known as the base coat. It is important to apply the same as it fills any uneven gap and covers imperfections while creating a smooth foundation. As it requires skills and precision, the experts do the process with maximum efficiency. After the base coat application and once the surface is refined, each of the layers is sanded and smoothed. This prepares the surface for the second and third layers of coating, creating a fine and sophisticated surface ready for paint.
Application of the paint
Once the surface is even and is taken care of imperfection, the process is followed by the last step which is the paint application. The use of paint helps in enhancing the longevity of the board and prevents it from damage. Once the entire process is completed, the experts make sure the surface is cleaned and any debris is properly disposed of.
In summary, GIB-stopping installation enhances the aesthetics as well as structural integrity of the walls, roofs, and the entire space. Hiring professionals helps with seamless finishing. GIB stopping boards transform spaces and create a sturdy environment. Experts pick the right type of plasterboard that is eco-friendly, and of high quality, and make sure the work is done meticulously and with utmost precision.